Tutorial: Needle Minder from an Enamel Pin
- chagenson18
- May 26, 2024
- 4 min read
Updated: Nov 21, 2024
Disclaimer: This post contains affiliate links to products I use. If you click on the link and order, I will earn a small commission (at no extra cost to you!). I only promote products that I find useful and would recommend to family and friends. Purchasing from affiliate links is a great way to support creators that you enjoy :)

I hand sew almost every day of the week for my Etsy business. And I had the horrible habit of setting my needle down and promptly forgetting where I put it. Thankfully I always ended up finding them pretty quickly, but I knew I needed a solution before I jabbed myself with one.
I headed to trusty Pinterest to find some cute ideas for needle minders. While there are plenty of ready-to-purchase ones in various styles, I really wanted to make my own so that it was one-of-a-kind (and whimsical, just like I like!)
Disclaimer: This post contains affiliate links to products I use. If you click on the link and order, I will earn a small commission (at no extra cost to you!) I only promote products that I find useful and would recommend to family and friends. Purchasing from affiliate links is a great way to support creators that you enjoy :)
The examples that most intrigued me were ones made from enamel pins. I LOVE enamel pins. I have them on backpacks, purses, and even my winter robe. As a small business owner, I like to support other small businesses wherever I can, so I went to Etsy to find an enamel pin (when I’m shopping on Etsy, I try to make sure that I’m purchasing from true small businesses). At the time of writing this blog, the shop that I purchased from (The Clever Clove) has updated that she is taking a few years off to spend time with her family so I cannot link the specific pin that I bought. But there are a plethora of options!

After I purchased the pin, I headed to Amazon to buy some magnets. The magnet will go on the back of the pin and that will be what holds the needle onto the pin. The magnets that I chose came in a pack of 68 and also included double-sided adhesive which is exactly what I needed. Here is an affiliate link to the magnets I ordered: https://amzn.to/40SCFq9

My needle minder is going on this lovely antique sewing box that I purchased at an antique store for about $15 and has become a daily staple! I love that I can carry it around so that if I decide I want to sew outside or in another room of the house, it’s perfectly portable! It does have some imperfections on the wood, but to me that shows how much it has been loved and used.

On one side of the top I have thread in various colors, and on the other side I have my needles. I need a lot of readily available needles since I use several colors every day and I don’t want to constantly be switching out colors in just one needle. I have them in a square piece of spare felt that I quickly cut out just so that the thread doesn’t get tangled and the needles stay in place.
Also, in the drawer underneath I put my really nice fabric scissors. This is to keep them out of sight from my husband since he has the horrible habit of using my fabric scissors to cut anything, so I have to hide them from him!


While this box does have cushions on top specifically for holding needles or pins, they’re not very useful for me since I usually keep both tops of the box open while I’m working since, again, I’m constantly switching needles for thread colors. So I’m going to put this needle minder on the side of the box. This is where the double-sided stickers are going to come in handy!
Materials:
Enamel pin
Wire or metal cutters
Magnets with double-sided stickers
Steps for making needle minder:
Since this is an enamel pin, I have to remove the pointy ends on the back. We have some wire cutters that worked perfectly for this since the metal is so thin. This next step is not necessary since I was able to cut it very close to the back and it was pretty flat, but my husband went the extra mile and sanded it down with our belt sander. Again, not necessary but I did appreciate it!

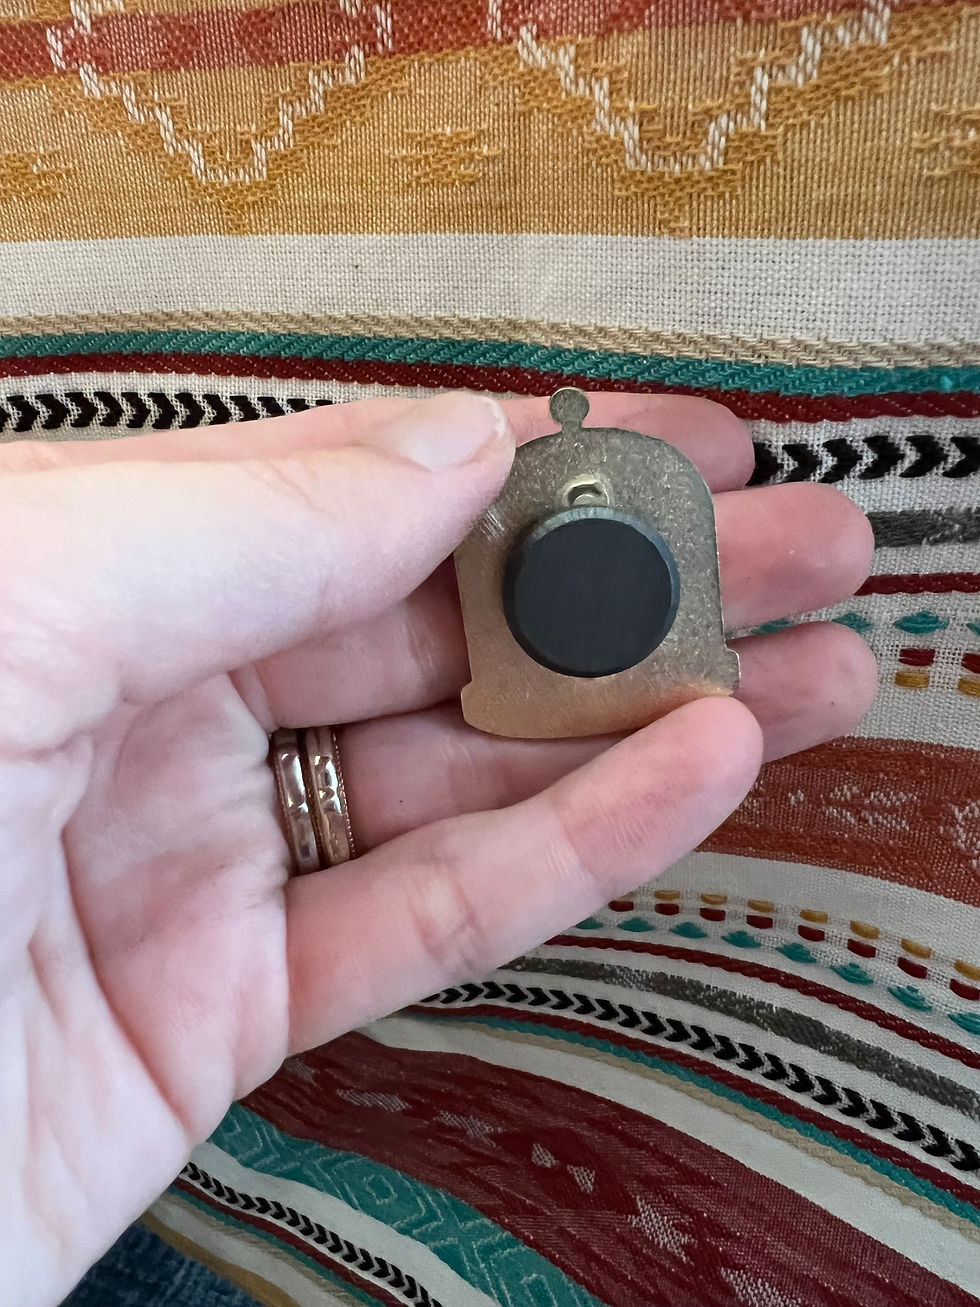
Attach a magnet to the back of the pin. I removed one side of the adhesive and attached it to the magnet. I then removed the other side and attached it to the enamel pin. I gave it some pressure for about 30 seconds to ensure a good hold.

3. I then placed another adhesive onto the other side of the magnet and then stuck it onto the sewing box. Again, I gave it some pressure for 30 seconds for maximum adherence.

4. Enjoy! The needle minder is now ready for use! I have been using it for several months now and it has absolutely been so nice to have. I haven’t misplaced a single needle since I’ve had it and it just brings me such happiness whenever I look at the cozy wintry hedgehog scene on the pin!

Once I had all of the materials, this DIY took less than 15 minutes to complete. I hope this gave you some ideas on making your own needle minder! Trust me, you will be so glad you did!


Comments